It’s difficult to walk into a gym and not run into someone trying to develop their posterior chain with set after set of hip thrusts. The exercise has actually been around for a long time, but it’s gotten a surge of popularity in the last 10 years or so, possibly fueled by social media trends and glute-building fascination.
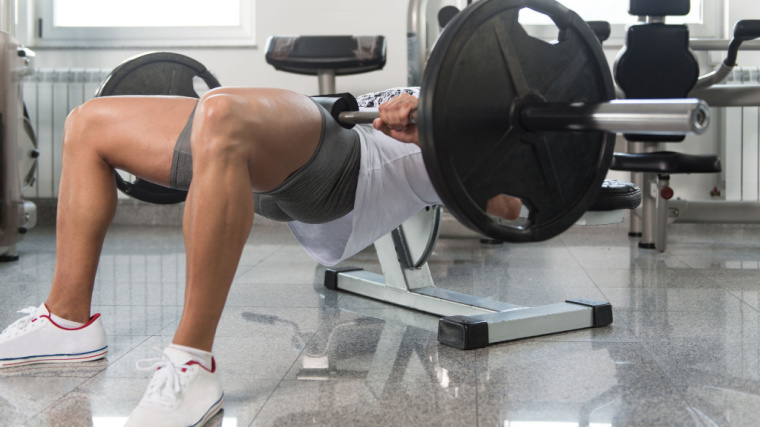
Many gyms even have specialized hip thrust machines, which offer a fixed path of movement and an easier setup than combining a flat bench, barbell, and an assortment of pads or steps. At its core, the hip thrust is a movement with many technical details worth considering. If you want the best results, read on for a full-scale breakdown of this powerful and popular lift.
- How to Do the Hip Thrust
- Hip Thrust Mistakes to Avoid
- How to Progress the Hip Thrust
- Benefits of the Hip Thrust
- Muscles Worked by Hip Thrust
- How to Program the Hip Thrust
- Hip Thrust Variations
- Frequently Asked Questions
How to Do the Hip Thrust
Presuming you don’t have access to a hip thrust machine, you’ll need to first gather a barbell (a five-footer will be easier to balance than a standard seven-foot bar), a sturdy flat bench, a bar pad to spare your hip bones once the weights get heavy, and plenty of plates to load.
Step 1 — Set Up the Starting Position
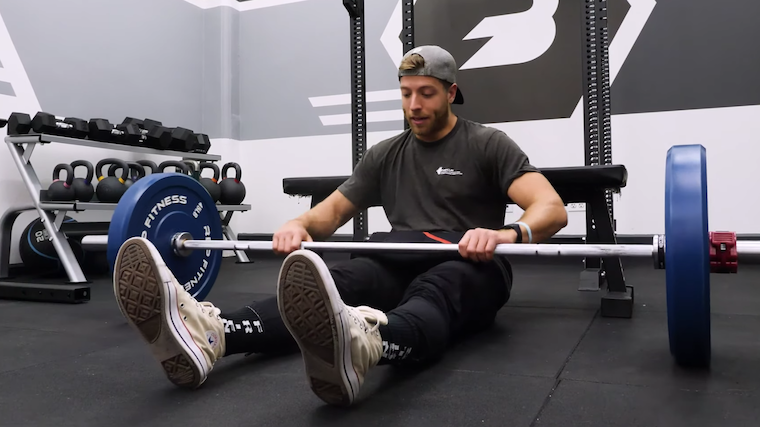
Sit on the ground perpendicular to the bench with the center of your shoulder blades resting on the corner of the bench pad. Set your feet a comfortable width apart — that’s probably going to lie somewhere between hip-width and shoulder-width. The loaded barbell should be on the ground with the bar above your knees.
Form tip: Sitting too close to the bench will throw off the trajectory of the bar. Sitting too far away won’t give you any leverage (and will probably make you slide off). Line up the bench with the middle of your shoulder blades as you lean against it in the starting position.
Step 2 — Prepare to Thrust

This exercise is a real dance with the physics of movement. Roll the bar over your hips and position the bar pad across your hip bones or lower abs. Place your hands on either side of the barbell, well beyond shoulder-width, with your palms down. Your hands are there to support and stabilize the bar, not to lift the weight.
Walk your feet several small steps toward your glutes and bend your knees. The bar should be cradled in your lap. Your thighs and torso should form a V-shape. Now you’re in position to thrust.
Form tip: To do a successful hip thrust, your upper back must function as the axis of rotation as you transfer power from your feet through your hips and into your upper body. Take time to fine-tune your foot width and stance to determine the most powerful and most effective starting position for your individual body.
Step 3 — Press and Squeeze
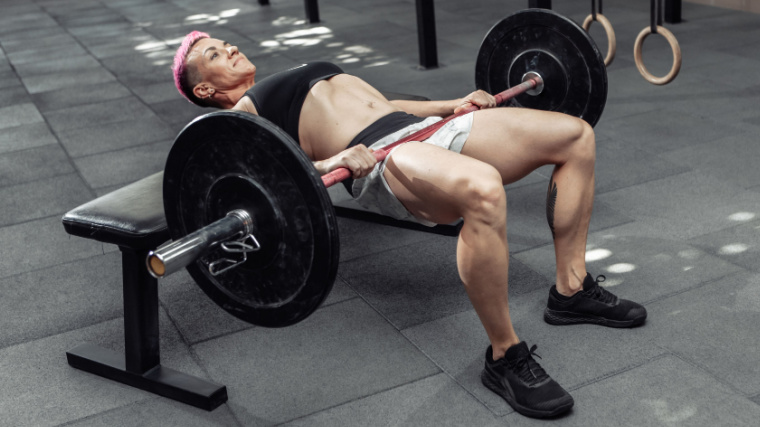
Grip the bar tight and brace your abs. Squeeze your glutes and drive your feet through the ground. Lift your hips to shoulder-height. Aim to create a “tabletop” position from your shoulders straight to your knees.
In the top position, your glutes, hamstrings, core, and upper back should be firing on all cylinders to control and stabilize the weight.
Form tip: Make sure your feet are far enough away from your body to promote 90-degree angles at your knee joints in the top position. If your feet can’t stay flat on the ground, or if you can’t reach a near-horizontal body at the top, your stance needs to be adjusted.
Step 4 — Lower with Control
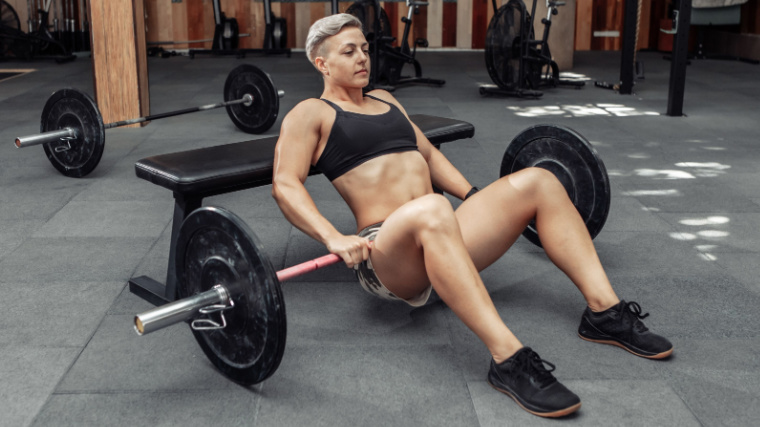
Pause for one second at the top and slowly lower your hips until the plates are hovering just above the ground.
Your glutes may or may not touch the ground in the bottom position depending on your leg length. Control the descent and don’t allow your body to bounce off the ground.
Form tip: Lower the weight slowly and be aware of where the ground is. Avoid bouncing the plates and rebounding into the next rep. Feel muscular tension and be in control of the movement at all times.
Hip Thrust Mistakes to Avoid
The hip thrust is prey to common errors that can lead to an inefficient, ineffective lift. Similar to deadlifts, leg presses, and squats, the hip thrust allows you to go relatively heavy, so it’s important to iron out the technical kinks before loading up. To do so, avoid these pitfalls.
Back Hyperextension
It’s extremely common to see this movement performed with most of the work being done by the lower back rather than the glutes and hamstrings. This happens when your glutes aren’t strong enough to posteriorly tilt the pelvis — tucking your hip bones “down and back” and your tailbone “up and forward.” If your pelvis can’t tilt properly, your glutes can’t be fully recruited (1).
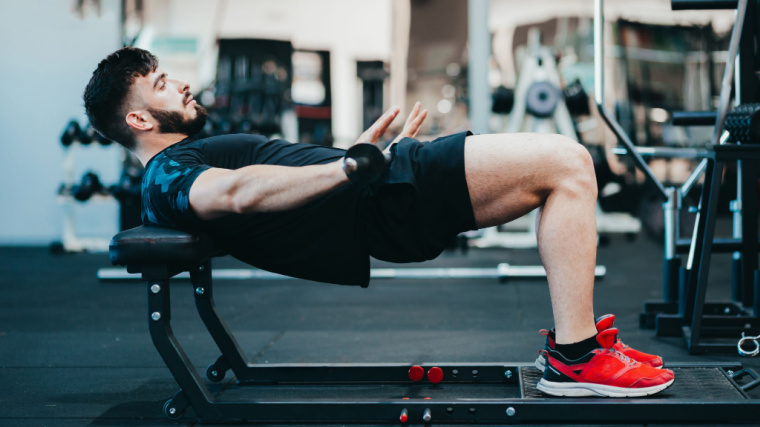
This may not be an issue when the muscles are under extremely light loads, but things get real once there’s a significant challenge placed upon them. Always be patient with the load to ensure proper technique is maintained.
Once your pelvis can’t achieve a posterior tilt, your gluteal muscles become less and less involved in the lift, leaving the lumbar spine (lower back) in extension. This inefficient position stresses lower back muscles even more and is an unfavorable load-bearing position for the spine.
Avoid it: When you’re doing the hip thrust, think about driving the bar backward over your head, rather than up toward the roof. This will cue your pelvis into the right pelvic tilt motion. It will also encourage your glutes to be activated through the concentric (lifting) portion of each rep.
Feet Too Close or Too Far
People falter when they start the movement with their feet too close to their glutes because it makes the movement rely just as much on knee extension as it does on hip extension. Doing so may “feel” comfortable initially, but a couple of things actually go wrong here.
It’s much easier for your heels to come off the ground when your feet are too close. This can add pressure to the knee joint capsule and isn’t a friendly position for lifters who have a history of knee injuries. More knee extension also means more quadriceps involvement and less work for the glutes and hamstrings.
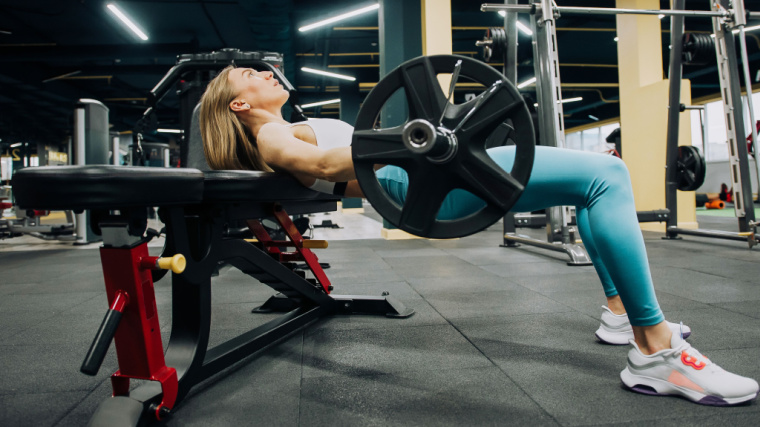
Pressing with your feet too far forward will limit your leverage, which reduces the amount of weight you can move. It also makes it more difficult to remain flat-footed in the bottom position, which means you either neglect the lower portion of the range of motion (which reduces muscle recruitment) or you lift your toes (which decreases overall stability).
Avoid it: The 90-degree angle rule should be respected when performing hip thrusts. Namely, at full extension (in the top position), your knees should create a 90-degree joint angle to balance efficient power output, muscle recruitment, and joint health. Before beginning your set, take the time to step your feet the ideal distance away from the bench, and from your glutes in the bottom position, to create a solid framework to reach the right joint angles.
Insufficient Range of Motion
As a whole, using a short range of motion can be a problem many lifters struggle with. This may be due to taking too many liberties with loading or it could simply be chalked up to poor exercise technique. In either case, an incomplete range of motion is responsible for decreased muscle-building and less strength gains. (2)
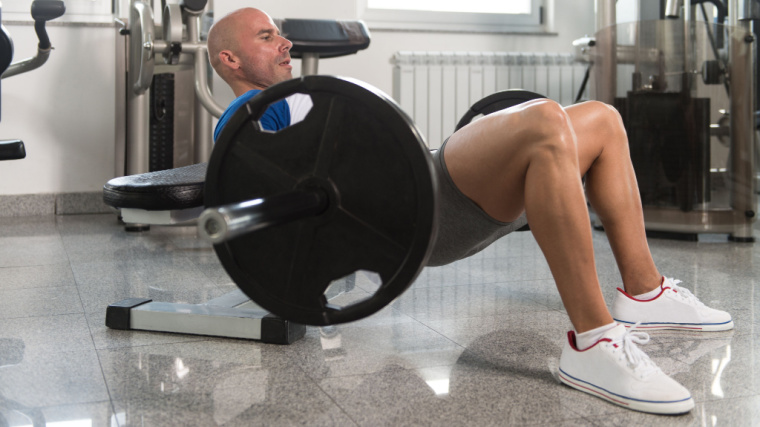
Understand the anatomy and biomechanics of the body. In the hip thrust, your hips can and should go into deep flexion (bending at the hips). Hip extension (opening your joint and straightening your legs) comes from properly using your glutes and hamstrings — the deeper in flexion they begin, the more they’re recruited and the more work they can do.
Hanging out in the mid-range of each rep and avoiding a full descent and full lockout may create some constant tension on the muscles, but it doesn’t do anything for building healthy muscles and joints. The hip extensors will be most involved at the top of this lift because that’s where mechanical tension is highest. For that reason, actually reaching a full lockout at the top is ideal.
Avoid it: Aim to lower your hips almost to the floor on each rep and bring them to a “tabletop” lockout position with your thighs running parallel to the ground. This will be the longest and most effective range of motion for the exercise.
How to Progress the Hip Thrust
While the standard hip thrust can accommodate all strength levels, some inexperienced lifters may need to build up to handling external load. On the other end of the spectrum, more experienced may eventually need an increased challenge beyond another weight plate. Here are the best options.
Bodyweight Hip Thrust
Certain exercises can be performed with identical technique regardless of external load while other movements use a weight as an integral part of their performance. For example, a pull-up is performed the same with or without added resistance, but performing a kettlebell swing without holding a kettlebell won’t allow the lifter to learn proper technique and doesn’t recruit the same musculature.
The hip thrust falls into the first category because the fundamental movement and muscle recruitment will be the same with or without a loaded barbell. For lifters unable to manipulate a standard barbell, or those still developing muscular coordination and building a mind-muscle connection, performing unweighted (bodyweight-only) hip thrusts can be an effective way to build very basic levels of strength while learning form which will directly carry over to the barbell movement.
Single-Leg Hip Thrust
Training with unilateral (single-leg) lower body movements can contribute to greater strength, power, and muscular development than focusing solely on bilateral (double-leg) training. (3) The single-leg hip thrust can be used with bodyweight-only or with added load, as a means of increasing the stability challenge and getting a greater overall training effect from relatively less weight.
For lifters who can’t tolerate excessively heavy loading, the single-leg hip thrust challenges the glutes, hamstrings, and core while putting the involved joints under lower stress than the bilateral movement.
Benefits of the Hip Thrust
Strength
The hip thrust, being a barbell movement which targets the powerful glutes and hamstrings, allows lifters to train with heavy weights. The involved muscles, along with the beneficial leverage of the movement, allow the hip thrust to potentially be one of the heaviest lifts in your exercise arsenal. This makes it an ideal alternative to the deadlift for building strength in the posterior chain (glutes, hamstrings, and lower back).
The hip thrust can support and build lower body strength which carries over to strength movements like the squat and deadlift, as well as creating a more stable base for overhead pressing movements.
Hypertrophy
Lifting relatively heavy weights for higher total volume with higher reps can be great for increasing the size of the target muscles. (4) Especially if deadlifts or squats aren’t agreeing with your individual leverages when it comes to making muscles grow, hip thrusts can be a worthwhile choice. One key reason the hip thrust circled back into the recent limelight was exactly because it was re-discovered to be a highly effective glute-builder. (5)
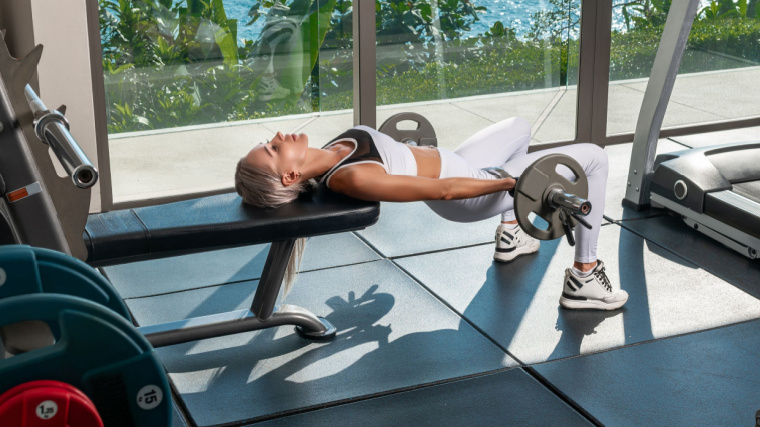
Targeting the quadriceps on the front of the thigh is often the goal for a muscular lower body, but the glutes and hamstrings contribute to a more aesthetic and well-rounded set of legs. Few physique-conscious lifters would say no to having a better looking set of glutes, and the hip thrust is a fast-track.
Joint-Friendly Training
The hip thrust enables a lifter to move relatively heavy loads with minimal compression on the spine. This is because the force angle is horizontal in nature, compared to squats and deadlifts which apply vertical forces to the spinal column.
This makes the hip thrust a viable option for anyone with a history of back or shoulder issues which would otherwise prevent them from holding a barbell on their back or support a front-loaded, lower back-stressing deadlift.
Muscles Worked by the Hip Thrust
The hip thrust is predominantly a glute exercise. If building a great looking and powerful backside is on your list of goals, the hip thrust should find a spot in your weekly routine. Beyond the glutes, the hip thrust trains much of the lower posterior chain. This includes the lower back and hamstrings. The calves are even worked statically, to a small degree, to support your body.
Glutes
Strong, developed glutes are a powerhouse for athletic ability, healthy hip function, and a balanced physique. Hip extension — bringing your legs backward in line with your upper body — is a fundamental movement controlled by the glutes, and the hip thrust trains this pattern directly.
Hamstrings
When the exercise is performed properly, your glutes should be the prime movers and first muscle to fatigue. However, your hamstrings are closely involved as secondary movers. Your hamstrings are highly active in the transition from the bottom portion of the repetition into the press toward lockout.
Core
Your abs and lower back play a small but significant role for general stability throughout each repetition. With your shoulder blades pinned to the bench, it’s essential that your core is stiff, strong, and constantly engaged to transfer power from your feet to your trunk. Without an active core, you’ll be unable to achieve lockout and your target muscles will be undertrained.
How to Program the Hip Thrust
Programming the hip thrust can accommodate a variety of training goals and workout plans. Here are some of the most effective ways to incorporate this adaptable exercise.
Heavy Weight, Moderate Volume
The hip thrust can be performed as the first movement in your workout. Given its capacity to be loaded fairly heavily, it can be used as a primary movement for any lower body workout. Four to six sets of four to six repetitions with a very challenging weight is a good place to start.
However, remember that it’s not wise to go hard and heavy with multiple “primary” lifts in a strength- or size-focused workout because your energy, focus, and form won’t last. Choose a main lift you’d like to focus on, and treat the remaining movements as “accessories” to that lift.
Moderate Weight, Higher Repetition
When using the hip thrust as a secondary or accessory movement, be sure to contrast the heavy lifting you did in the first exercise (likely a squat or deadlift) with relatively higher rep work with lower weight in the hip thrusts. Not only will this ensure your spine’s safety and the use of good technique while fatigued, but it will also spare your central nervous system of too much output over the course of your workout.
Performing the hip thrust after squats or deadlifts is fair game because it won’t be doubling down on spinal compression to compete with the first lift you chose. Try three to four sets of 10 to 15 reps squeezing a strong peak contraction on every repetition.
Hip Thrust Variations
You may not have a barbell, bench, bar pad, and plates to properly load and safely perform standard hip thrusts. If that’s the case, the question then becomes, “What will best simulate the same training effect as the loaded hip thrust?” Here are the answers.
Deficit Single-Leg Hip Thrust
In the absence of weights, bodyweight training can be used with a deficit and paired with unilateral movement. This can come in handy for creating a surprisingly challenging level of effort for any lifter.
View this post on Instagram
The use of an elevated platform combined with a single-leg hip thrust allows for a greater range of motion and increased muscle recruitment. Though no external weight is being used, the deficit and increased time under tension requires a much greater effort than a standard bodyweight hip thrust.
Glute Bridge
Another effective alternative to the hip thrust would be doing a glute bridge. This serves a role for anyone without a bench, but also for anyone who may not yet have the technique to use the relatively long range of motion that a classic hip thrust requires. A glute bridge essentially cuts the movement in half by starting in a supine position on the floor rather than supported on a bench.
The general performance is virtually the same as a hip thrust, but your hips begin in a less flexed position, meaning fewer opportunities for other muscle groups to contribute to the concentric (lifting) movement. A lifter will “bridge up” on their shoulders, while keeping the bar across their hips as their glutes press away.
Kettlebell Swing
One more hip thrust alternative works the same movement pattern using a much lower load, but requires much more concentric velocity. It’s the popular kettlebell swing. The swing is performed standing vertically, but the weight travels between your legs in a horizontal path. This keeps your glutes and hamstrings as the true drivers of the weight and delivers the same benefits as the hip thrust.
The swing also involves a more rapid rate of contraction, meaning there’s less time to perform each rep. Your technique must be on-point in order to reap the benefits of this movement, since there’s much less of an available window to get tight, brace, and feel each rep.
Step-Up
A surprisingly effective hip thrust alternative doesn’t actually look like a hip thrust at all. The step-up is another way to do a loaded version of a hip extension pattern, while paying special attention to your knee position and involvement by keeping a vertical shin position.
Loading a step-up with dumbbells in your hands or with a bar on your back is equally acceptable. Angling your torso slightly forward on each repetition allows your glutes to work even harder by extending the hip from a position of deeper flexion.
FAQs
Can I use a dumbbell for hip thrusts?
In general, a barbell will be easier to balance and stabilize than a dumbbell. Because the diameter of the dumbbell is much larger than a barbell, it will sit differently in your hip crease and will likely interrupt your range of motion in the bottom position. Barbells will also allow you to go much heavier than any dumbbell you’ll find lying around the gym.
Ideally, use a straight barbell, either the standard seven-foot bar or shorter five-foot bar. You might also find an EZ-curl bar to sit more comfortably on your hips due to the angled handles, especially if you don’t have a bar pad. You can also consider using the Smith machine if you set up the bench properly and find an effective foot position. However, if you must use a dumbbell, be sure to use a complete range of motion, reaching your hips toward the ground and achieving a full contraction at the top.
Can I do the hip thrust and deadlift in the same workout?
If your goal is building major size and strength in your glutes and hamstrings, a one-two punch of deadlifts and hip thrusts can be a great approach if it’s programmed properly. Choose one of the movements as the main lift and hit it with heavy weight and low reps, and follow it up using the second exercise with a relatively higher rep range and moderately heavy weights.
In Thrust We Trust
The hip thrust definitely has some constraints, such as the learning curve of technique and potential hip discomfort from the weight itself, but this efficient movement also allows for good versatility in your program. It belongs in any routine designed to improve the strength and size of your posterior chain, while also carrying over to other lifts. The hip thrust is one of those few “can’t go wrong” movements that can satisfy a massive crowd of lifters. You’ll be glad you added it to the mix. Your spine will thank you, too.
References
- Queiroz, B. C., Cagliari, M. F., Amorim, C. F., & Sacco, I. C. (2010). Muscle activation during four Pilates core stability exercises in quadruped position. Archives of physical medicine and rehabilitation, 91(1), 86–92. https://ift.tt/O2gW8w4
- Pallarés, JG, Hernández-Belmonte, A, Martínez-Cava, A, Vetrovsky, T, Steffl, M, Courel-Ibáñez, J. Effects of range of motion on resistance training adaptations: A systematic review and meta-analysis. Scand J Med Sci Sports. 2021; 31: 1866– 1881. https://ift.tt/vMD85Er
- Ramirez-Campillo, Rodrigo & Burgos, Carlos & Henríquez-Olguín, Carlos & Andrade, David & Martínez, Cristian & Álvarez, Cristian & Castro-Sepulveda, Mauricio & Marques, Mário & Izquierdo, Mikel. (2015). Effect of Unilateral, Bilateral, and Combined Plyometric Training on Explosive and Endurance Performance of Young Soccer Players. The Journal of Strength and Conditioning Research. 29. 1317–1328. 10.1519/JSC.0000000000000762.
- Schoenfeld, B. J., Contreras, B., Krieger, J., Grgic, J., Delcastillo, K., Belliard, R., & Alto, A. (2019). Resistance Training Volume Enhances Muscle Hypertrophy but Not Strength in Trained Men. Medicine and science in sports and exercise, 51(1), 94–103. https://ift.tt/7osUAON
- Neto, W. K., Vieira, T. L., & Gama, E. F. (2019). Barbell Hip Thrust, Muscular Activation and Performance: A Systematic Review. Journal of sports science & medicine, 18(2), 198–206.
Featured Image: gpointstudio/ Shutterstock
The post How to Do the Hip Thrust — Variations, Benefits, and Common Mistakes appeared first on Breaking Muscle.

0 Comments