In nearly a decade of teaching yoga, I’ve yet to encounter a student who’s lukewarm on pigeon pose. Yoga students either love this hip opener or hate it.
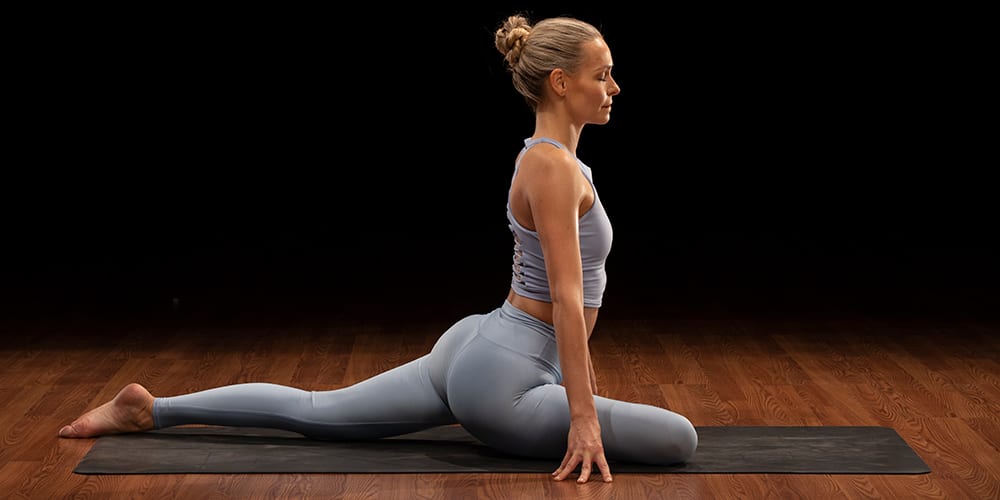
Pigeon pose, or kapotasana, feels amazing when you do it right — the front leg externally rotates to stretch the hip, while the back leg affords the flexors a good stretch — so it’s worth learning how to safely set it up.
“Pigeon pose is not a one-position-fits-all exercise,” says Stephanie Saunders, vice president of fitness programming for BODi and a certified yoga instructor.
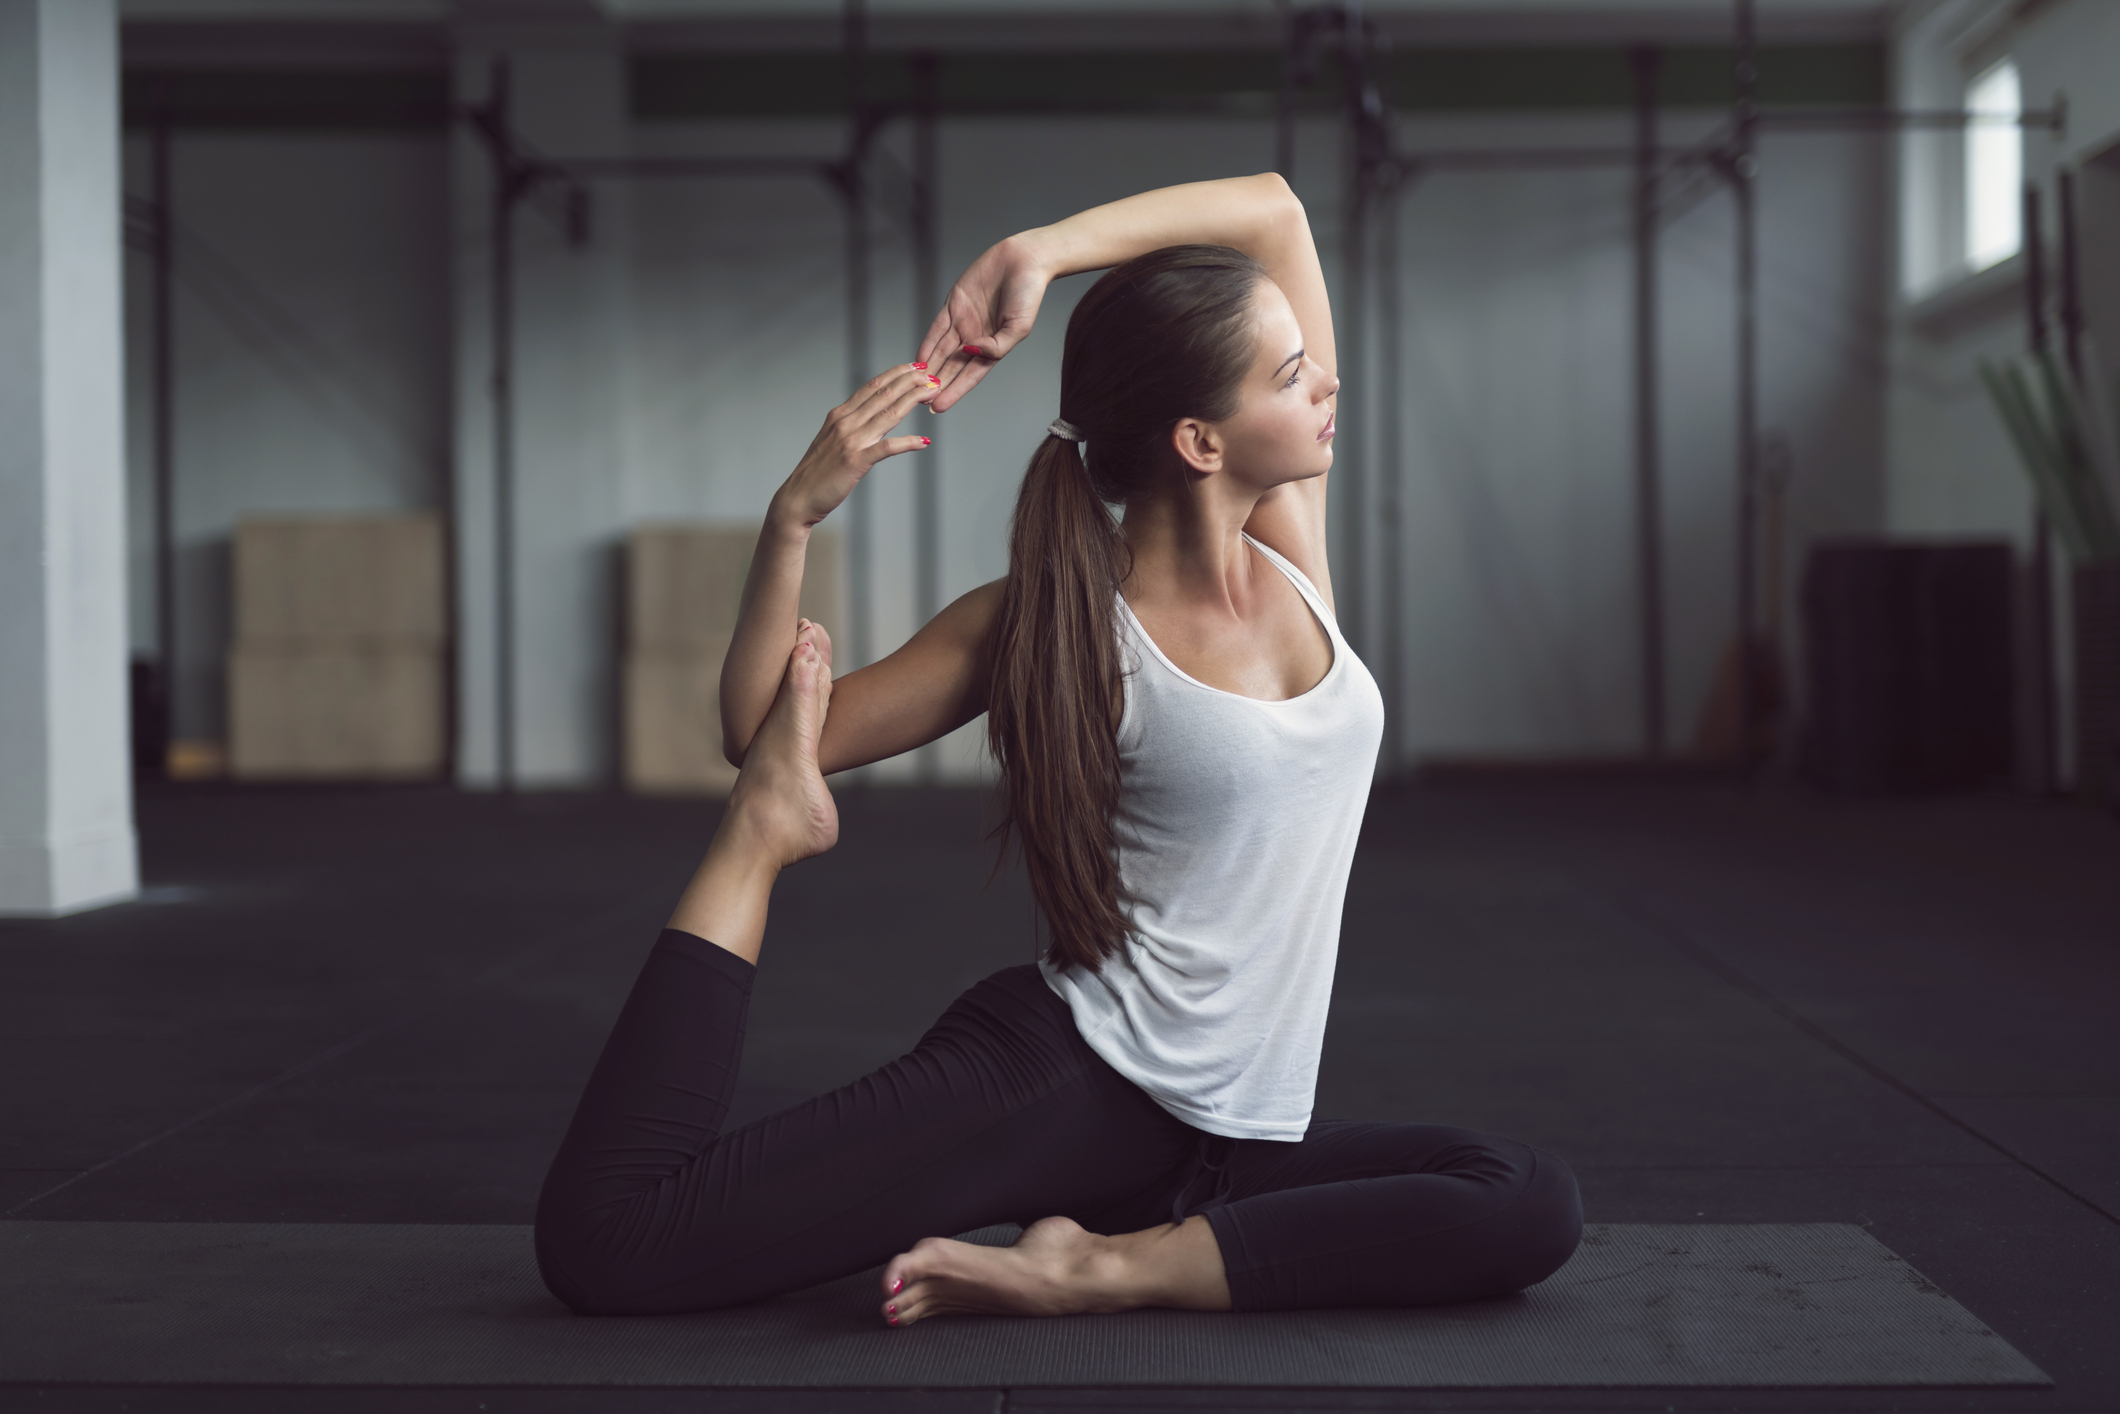
Kapotasana is a variation on king pigeon pose (eka pada rajakapotasana), a one-legged backbend from ashtanga yoga‘s fourth series (which actually gives a different pose the name kapotasana).
When it comes to pigeon pose, yoga is full of variations, like seated pigeon, reclined pigeon, and even flying pigeon pose.
And why do we call it pigeon pose? When you’re in the upright position of kapotasana, your chest is lifted just like a pigeon’s. Here’s how to get there safely and effectively.
Pigeon Pose (Kapotasana): Step-by-Step Instructions
We’ll walk through both the upright and forward-bend variations of kapotasana.
- Get on all fours, with your hands shoulder-width and knees hip-width apart.
- Bring your right knee forward, placing it on the floor behind your right wrist.
- Slide your right ankle toward your left wrist, so your right shin crosses your mat at a comfortable angle.
- Extend your left leg straight back and slowly lower your hips to the floor. The top of your left foot should be flat on the floor.
- Keep your hips level, with your weight evenly distributed between them (avoid sinking into your right hip).
- From here, you can either remain upright — keeping your hands on the floor in front of you, your chest up, and your core engaged — or you can fold forward, slowly walking your hands out in front of you and lowering your chest to the floor.
- Hold the pose for 5 to 10 breaths, then switch sides and repeat.
- To come out of the pose, tuck your left toes under, press into your hands, and slowly bring your right foot back to the starting position.
How to Make Pigeon Pose Easier
If you have tight hips or encounter discomfort in your knees or lower back, there are plenty of modifications you can do to make pigeon pose easier.
- Use a block or folded blanket under the hip of your bent leg to help keep the weight balanced between both sides of the pelvis.
- Use blocks under your hands when upright, or a bolster under your chest when folding forward.
- Flex the toes of your bent leg to keep your knee supported.
How to Make Pigeon Pose Harder
If you have happy hips that love the stretch in pigeon pose, here’s how you can go deeper.
- Work the front shin closer to parallel with the front of your mat (as long as there is no discomfort in your knee).
- While activating your adductors (inner thighs), come onto your fingertips — or challenge your balance by lifting your arms overhead.
- Bend your back leg, and reach for the top of your foot for a deeper hip flexor stretch, shoulder opener, and backbend.
Beginner Tips for Doing Pigeon Pose
If you’re new to pigeon pose, start slow and listen to your body. Make sure your front knee is comfortable. You should never feel pain or stretching in your inner knee, hip joints or lower back.
If you do, come out of the pose and start again, focusing on externally rotating your femur in the hip socket.
Resist the urge to line up your shin with the top of your mat. While this alignment cue is considered “ideal,” Saunders says, “this can put pressure on the knee, especially if there is any restriction in the hip joint.” So choose a position for your shin that keeps your knee safe.
Benefits of Pigeon Pose
Pigeon pose stretches both the hip flexors on the front of the thigh and pelvis (including the psoas) and your hip rotators on the back/side of the pelvis (including the piriformis).
It also increases range of motion of the femur in the hip socket.
Pigeon pose helps warm up the body for backbends or seated poses that require external hip rotation, like lotus pose.
It’s also beneficial for the back. “We know that increasing flexibility in the hips and pelvis can help with sciatica and back pain,” says Saunders.
Take your practice further with BODi’s Yoga52, a collection of 52 elegantly-produced yoga classes from beginner to expert taught by five of the world’s leading yoga instructors.
The post How to Do Pigeon Pose in Yoga (Kapotasana) appeared first on BODi.


0 Comments